Trashly
- by: CymolThemes
Thank you for purchasing this theme. If you have any questions that are beyond the scope of this help file, feel free to contact us via our Support ticket system. We will do our best to answer you in shortest of time (24-48 hours usually).
How to Install WordPress ? https://wordpress.org/support/article/how-to-install-wordpress/
System requirements
To use Trashly WordPress Theme, we recommend your host supports WordPress 5 or greater, PHP 7.0 or greater version (WordPress is now recommending PHP 7, read more) and mysql 5 or greater version.
PHP Configuration limits
- memory_limit 128M
- max_input_vars 1000
- max_execution_time 120
- post_max_size 32M
- upload_max_filesize 32M
- allow_url_fopen ON
Theme Installation
You have two ways to install a theme.
1. First way: Upload Theme via FTP Client
Do not upload the Entire Zip File you get from Themeforest. Please follow following Steps to upload theme via FTP:
Step 1: Extract the package, you have downloaded. In the package folder you will get below sub-folders.
.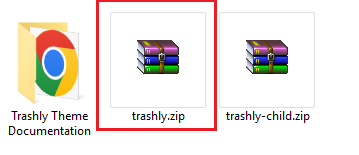
Step 2: Extract the theme name zip file. Ex, trashly.zip
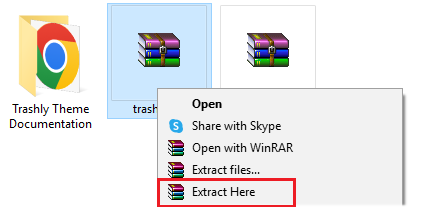
Step 3: Extract the package, you have downloaded. In the package folder you will get below sub-folders.
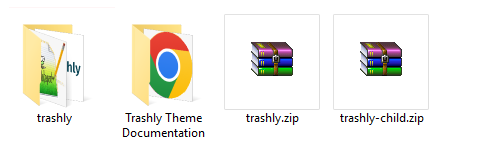
Step 4: Upload the theme folder under "wp-content/themes" directory.
Step 5: Now go to Admin > Appereance > Themes page and activate the theme.
2. Second way: Upload Theme via WordPress admin panel
- Login to admin panel.
- Navigate to Appearance > Themes and click on the Add New button.
- Choose Upload theme option. Click on Browse…(Choose file in Safari/Chrome), select the “trashly.zip” and click Install Now button.
- After successfull installation click on Activate or proceed to Appearance > Themes and click on Activate to activate the newly installed theme.
- After the theme’s activation you will be prompted to install recommended plugins.All these plugins are included into the theme’s archive or can be installed (optionally) from the WordPress.org repository on your own.
The theme may function without any of these plugins. But if you want your website look precisely as on demo page, you should install all the recommended plugins and import demo content. This is a good idea if you are building your website from scratch.
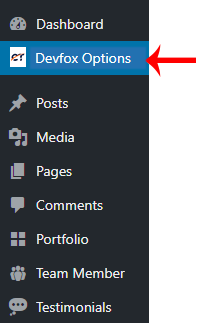
However, if you have an existing website, you should be very careful with plugin installation and importing dummy data – this might affect your site content and structure. - Once it’s done a new menu item Trashly Options will appear.
Demo Content Installation
One-Click Demo Content Installation
We set easy one-click process for full demo content setup. This demo content setup will also import slider in "Revolution Slider" plugin and also do some extra settings. Please follow steps given below. All you need to do is to navigate to Admin > Appearance > Import Demo Data Page. Hit Import this demo.
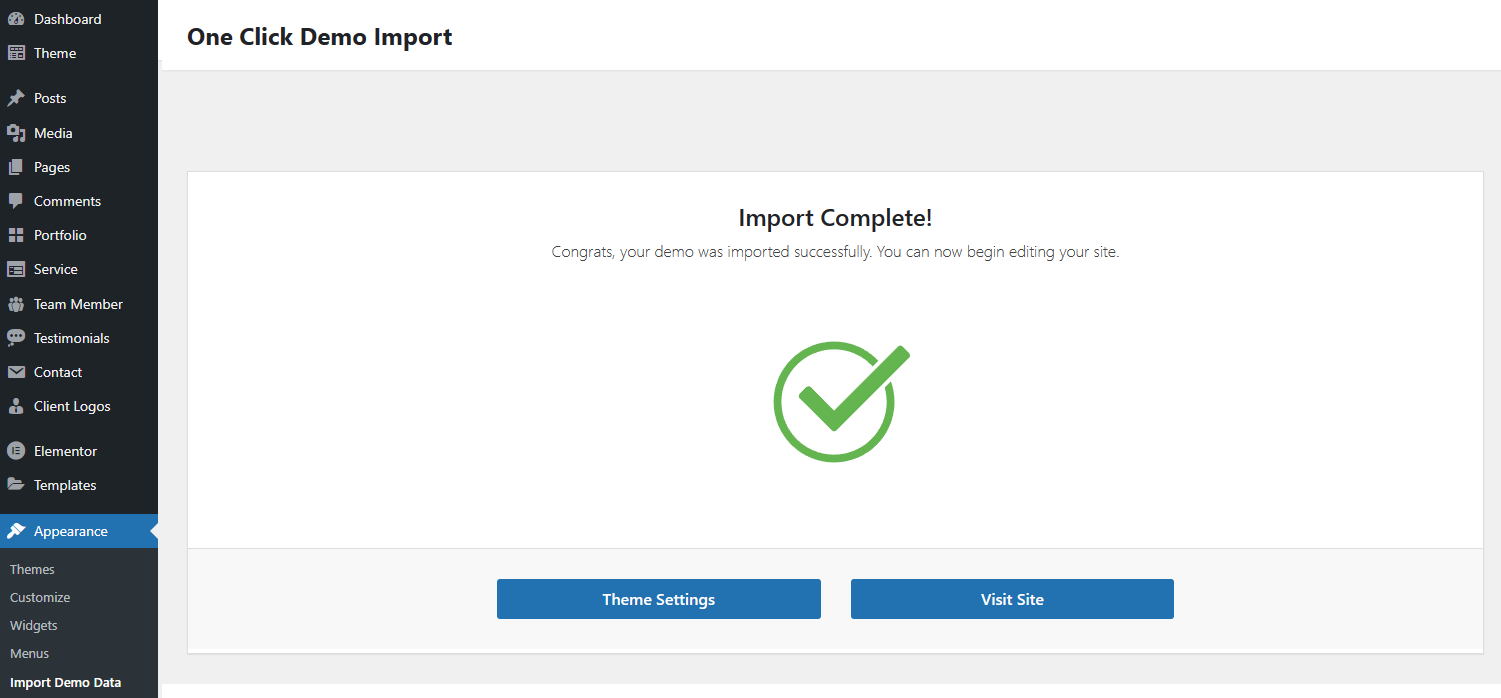
Wait until the import routine is done. Please be patient and don’t navigate away, as this can take few minutes depending on your host’s performance.
When finishing, You will be notified once the process is completed it should look like this:
Getting Started
Know theme's different areas
Here we described all the different areas and what it's called in our theme so you can find right option in Theme Options section.
-
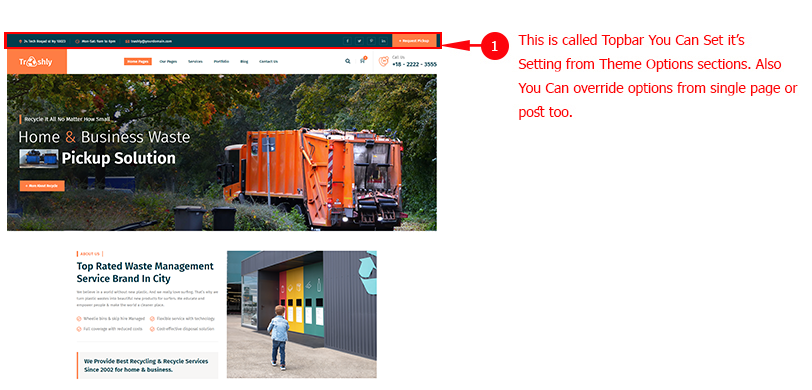
1. Topbar
-
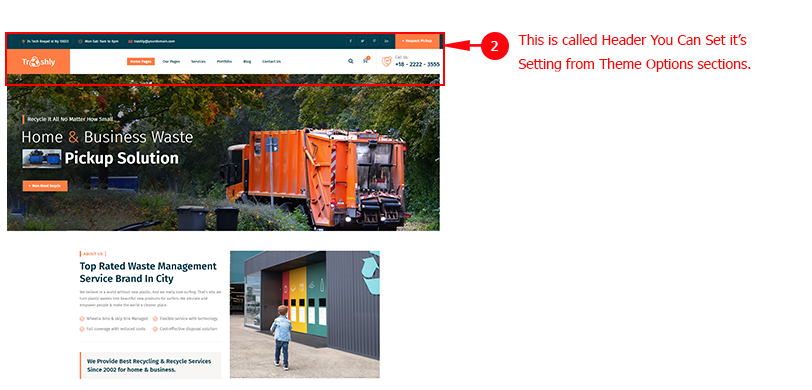
2. Header
-
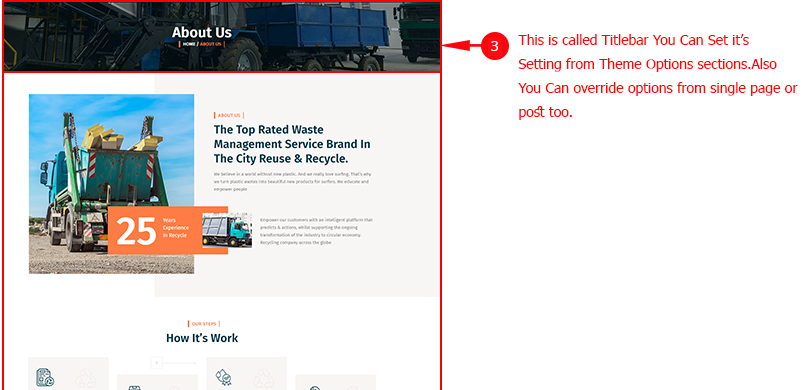
3. Titlebar
-
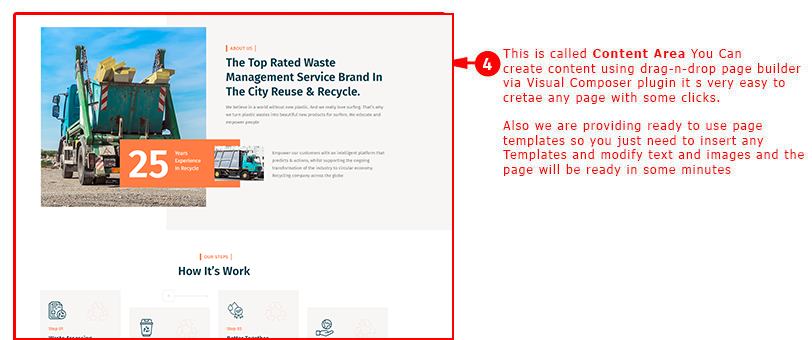
4. Content Area
-
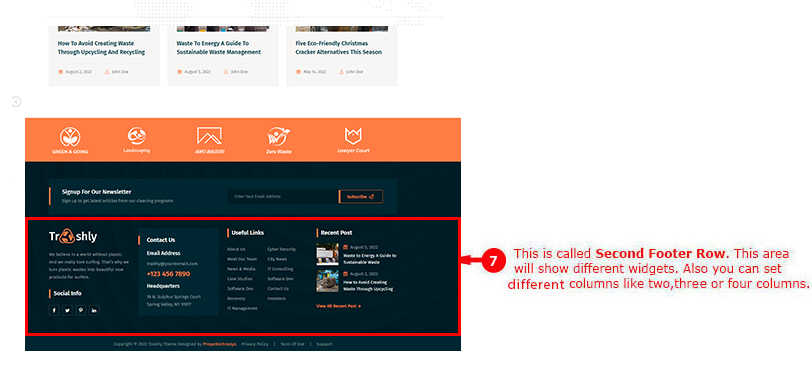
5. Footer Area - Second Row
-
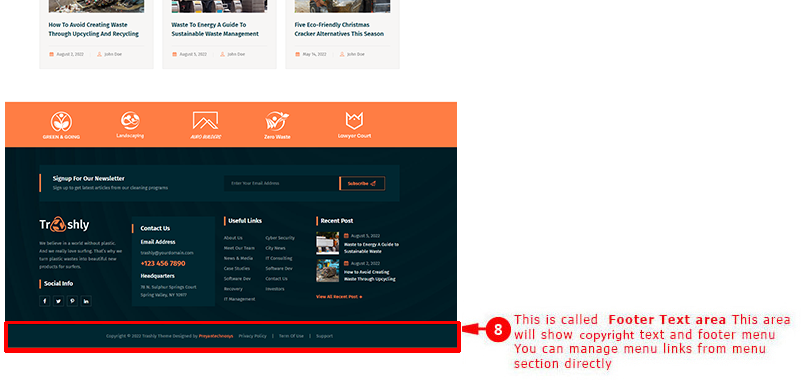
6. Footer Area - Copyright Text Area
Theme Options
You can customize Trashly settings via "Trashly Options". You can upload logo or change skin color etc. Here are details of each section that you can customize.
Layout Settings
You can change Layout related changes here. Like you can switch to Boxed or Wide layout, or you can select Skin color from here.
Skin Color

This is the global color for all hightlighted things. This color will be used in Tabs, Accordion, Progress bar, text link and other areas. We have provided some pre-defined colors for you which you will also find on our demo site.
Topbar Settings
Topbar is a shortcut info bar for your clients. You can provide email address or your phone number here so visitor can contact you instantly. Also you can show social icons here.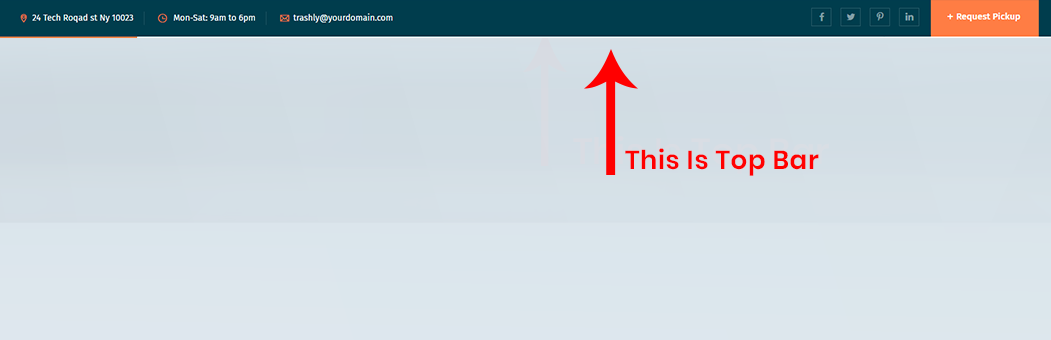
Titlebar Settings
You can change settings for Titlebar from here.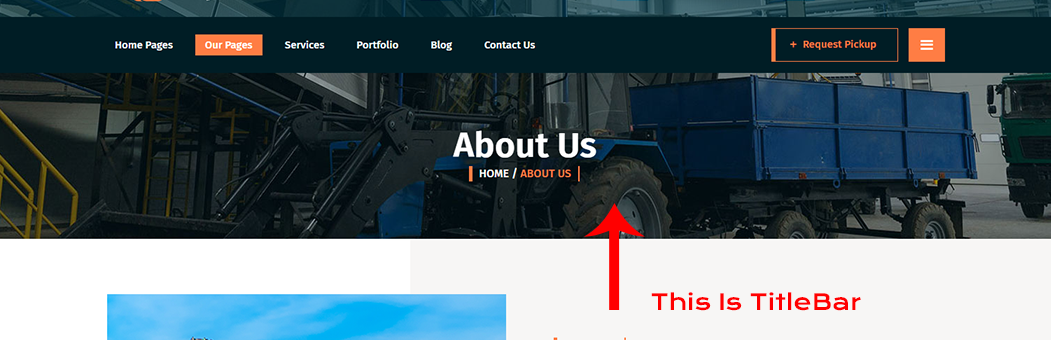
Header Settings
You can change header settings from here. You can upload logo, enable or disable sticky header etc.
Menu Settings
You can manage menu and sub-menu (dropdown menu) settings from here. You can also change Responsive Menu Breakpoint from here (from which display size the menu will become single icon mode). You can change Font-family, font-size, font-color, background-color etc properties for both main-menu and sub-menu both.
Footer Settings
You can change footer text from here. You can use the following shortcodes in your footer text: [cmt-site-url], [cmt-site-title], [cmt-site-tagline] and [cmt-current-year]
Login Page Settings
You can login page background image, background color and other setttings from here.
Blog Settings
You can change settings for Blog section from here.
Team Member Settings
You can settings for "Team Member" section from here.
Portfolio Settings
Change settings for portfolio
Error 404 Page Settings
You can change Error 404 page content from here.
Search Page Settings
You can change Search results page settings from here.
Sidebar
You can change Sidebar related settings from here. Also you can create a new sidebar from here.
Social Links
You can set URLs from Social links from here. Also you can enable or disable RSS feed link from here.
WooCommerce Settings
You can change settings related to WooCommerce from here.
Under Construction Site
The Trashly theme comes with built-in Under Construction mode so you don't need to install any other plugin for it. You can enable it from here. You can change text and background settings from here. Here are steps:
- First go to Admin > Trashly Options section and go to "Under Construction Site" tab.
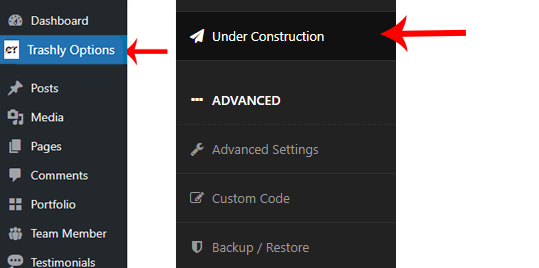
- Than enable it by selecting YES in the Show Under Construciton Message option.
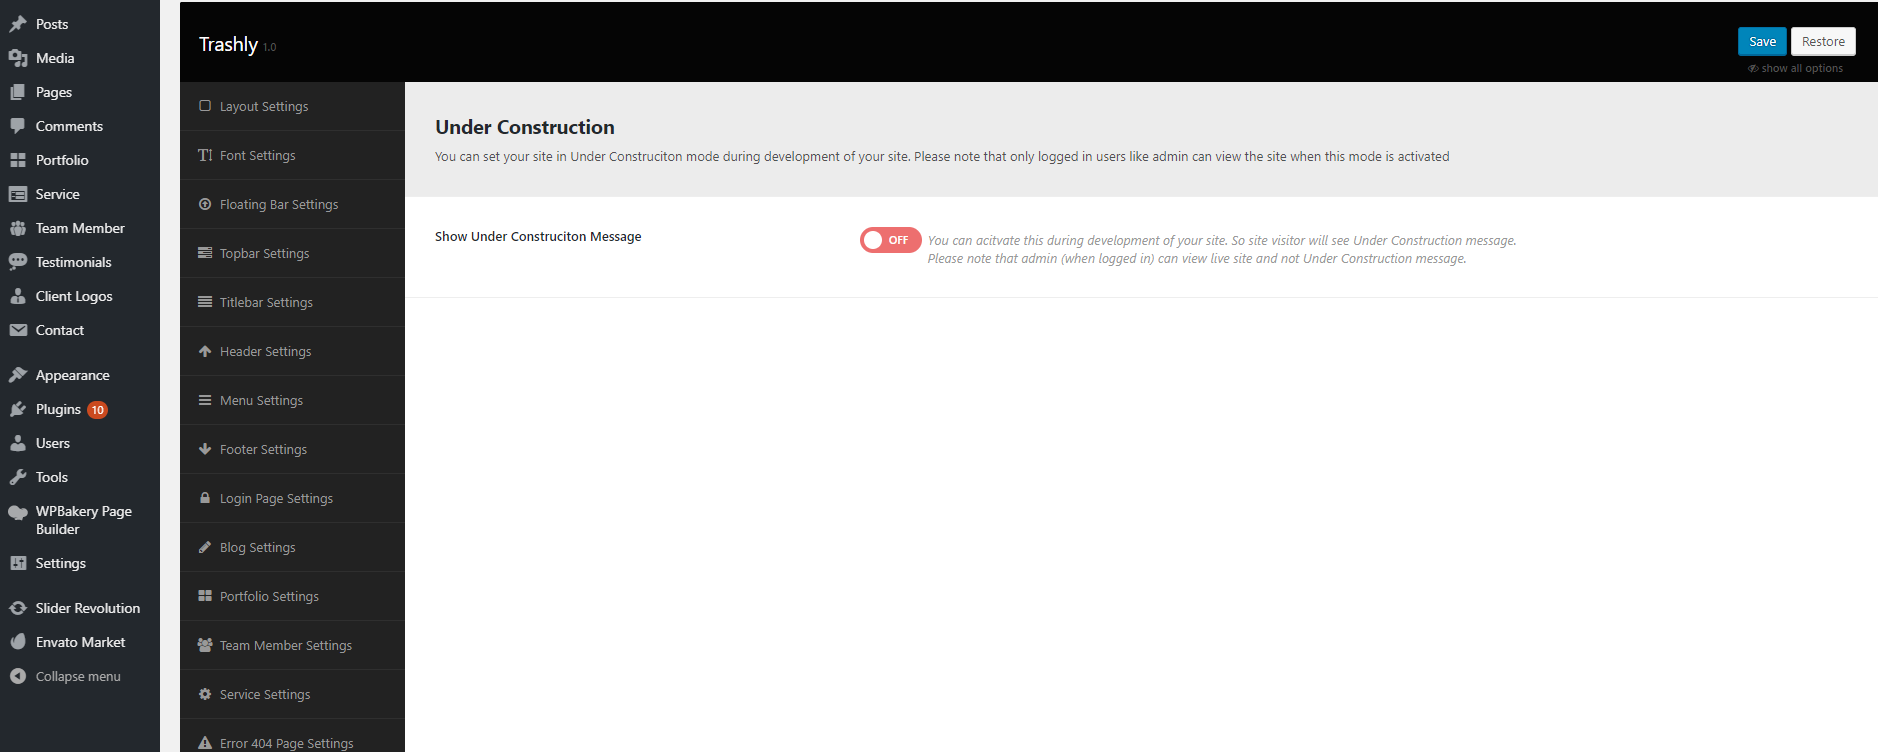
- Now you will see other options like content and background settings. Just change it if you like to.
Advanced Settings
You can set advanced settings (like SLUG for different post type) from here.
Custom Code
You can write your custom CSS or JavaScript code here. Also you can add Custom CSS Code for login page too.
Theme Information
You will get theme details like version and developer details from here.
Import / Export
You can import or export theme settings from here. This will be usefull when you are developing your site on other server and want to move only theme settings. Just click "Download" button to export the settings and click "Import from file" button to import it.
Note: When you click on "Import from file" than it will open new textbox. Just open the downloaded file in any text editor and copy paste code here to import.
Sidebars and Widgets
Widget Positions
Trashly has some built-in Widget Positions to use. Here are details of each position:
- Left Sidebar For Blog: You can add Widgets that you want to display as Left sidebar for Blog pages like Blogroll, Category, Tag, Archives etc pages.
- Right Sidebar For Blog: You can add Widgets that you want to display as Right sidebar for Blog pages like Blogroll, Category, Tag, Archives etc pages.
- Left Sidebar For Pages: You can add Widgets that you want to display as Left sidebar for pages that you created using Pages section.
- Right Sidebar For Pages: You can add Widgets that you want to display as Right sidebar for pages that you created using Pages section.
- Left Sidebar For Portfolio: You can add Widgets that you want to display as Left sidebar for single Portfolio that you created from Portfolio section.
- Right Sidebar For Portfolio: You can add Widgets that you want to display as Right sidebar for single Portfolio that you created from Portfolio section.
- Left Sidebar For Portfolio Category: You can add Widgets that you want to display as Left sidebar for Portfolio Category that you created from Portfolio Category section.
- Right Sidebar For Portfolio Category: You can add Widgets that you want to display as Right sidebar for Portfolio Category that you created from Portfolio Category section.
- Left Sidebar For Team Member: You can add Widgets that you want to display as Left sidebar for single Team Member that you created from Team Member section.
- Right Sidebar For Team Member: You can add Widgets that you want to display as Right sidebar for single Team Member that you created from Team Member section.
- Left Sidebar For Team Member Group pages: You can add Widgets that you want to display as Left sidebar for Team Member Group that you created from Team Member Group section.
- Right Sidebar For Team Member Group pages: You can add Widgets that you want to display as Right sidebar for Team Member Group that you created from Team Member Group section.
- Left Sidebar For Search: You can add Widgets that you want to display as Left sidebar for Search Results page only.
- Right Sidebar For Search: You can add Widgets that you want to display as Right sidebar for Search Results page only.
- Left Sidebar for WooCommerce Shop: You can add Widgets that you want to display as Left sidebar for WooCommerce pages only. This widget position is specially created for WooCommerce pages only. You can add widgets like Cart, Login, Recently Viewed Products etc widgets here.
- Right Sidebar for WooCommerce Shop: You can add Widgets that you want to display as Right sidebar for WooCommerce pages only. This widget position is specially created for WooCommerce pages only. You can add widgets like Cart, Login, Recently Viewed Products etc widgets here.
- Floatingbar Widget - Top: This widget will be shown as full row (as 1st row). This will be full width widget without any column. All wildgets will be shown below each one. So there is no column.
- Floatingbar Widget - 1st Column: This widget will be shown as 1st column in this second row. Also please note that the column will be shown as column only in TOP view of Floating Bar. If you are showing in RIGHT view than the column will be broken and each widget will be shown in full width and column will not be applied.
- Floatingbar Widget - 2nd Column: This widget will be shown as 2nd column in this second row. Also please note that the column will be shown as column only in TOP view of Floating Bar. If you are showing in RIGHT view than the column will be broken and each widget will be shown in full width and column will not be applied.
- Floatingbar Widget - 3rd Column: This widget will be shown as 3rd column in this second row. Also please note that the column will be shown as column only in TOP view of Floating Bar. If you are showing in RIGHT view than the column will be broken and each widget will be shown in full width and column will not be applied.
- Floatingbar Widget - 4th Column: This widget will be shown as 4th column in this second row. Also please note that the column will be shown as column only in TOP view of Floating Bar. If you are showing in RIGHT view than the column will be broken and each widget will be shown in full width and column will not be applied.
- Floatingbar Widget - Bottom: This widget will be shown as full row (as 3rd row). This will be full width widget without any column. All wildgets will be shown below each one. So there is no column. Please note that the Floating bar view should be TOP to show as 3rd row. If you are using RIGHT floating bar than this will be last row as all the column widgets will be in full width and shown as one column.
- First Footer - 1st Widget Area: This will be shown as 1st column in 1st row of footer area. You can set how many columns you like to show from "Trashly Options > Footer Settings" section.
- First Footer - 2nd Widget Area: This will be shown as 2nd column in 1st row of footer area. You can set how many columns you like to show from "Trashly Options > Footer Settings" section.
- First Footer - 3rd Widget Area: This will be shown as 3rd column in 1st row of footer area. You can set how many columns you like to show from "Trashly Options > Footer Settings" section.
- First Footer - 4th Widget Area: This will be shown as 4th column in 1st row of footer area. You can set how many columns you like to show from "Trashly Options > Footer Settings" section.
- Second Footer - 1st Widget Area: This will be shown as 1st column in 2nd row of footer area. You can set how many columns you like to show from "Trashly Options > Footer Settings" section.
- Second Footer - 2nd Widget Area: This will be shown as 2nd column in 2nd row of footer area. You can set how many columns you like to show from "Trashly Options > Footer Settings" section.
- Second Footer - 3rd Widget Area: This will be shown as 3rd column in 2nd row of footer area. You can set how many columns you like to show from "Trashly Options > Footer Settings" section.
- Second Footer - 4th Widget Area: This will be shown as 4th column in 2nd row of footer area. You can set how many columns you like to show from "Trashly Options > Footer Settings" section.
Footer Widgets
Trashly comes with special widget positions for footer area:
The Footer Area is divided in TWO section. Those are First Row Widget Area & Second Row Widget Area. Here is some short description on each point.
First Row Widget Area: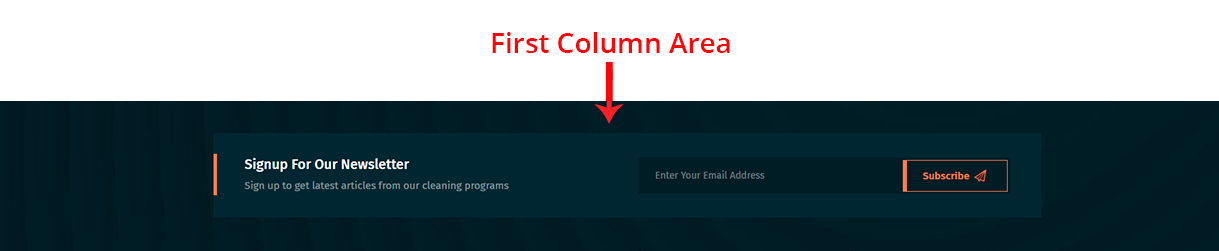
- First Footer - 1st Widget Area: This will be shown as 1st column in 1st row of footer area. You can set how many columns you like to show from "Trashly Options > Footer Settings" section.
- First Footer - 2nd Widget Area: This will be shown as 2nd column in 1st row of footer area. You can set how many columns you like to show from "Trashly Options > Footer Settings" section.
- First Footer - 3rd Widget Area: This will be shown as 3rd column in 1st row of footer area. You can set how many columns you like to show from "Trashly Options > Footer Settings" section.
- First Footer - 4th Widget Area: This will be shown as 4th column in 1st row of footer area. You can set how many columns you like to show from "Trashly Options > Footer Settings" section.
Second Row Widget Area: 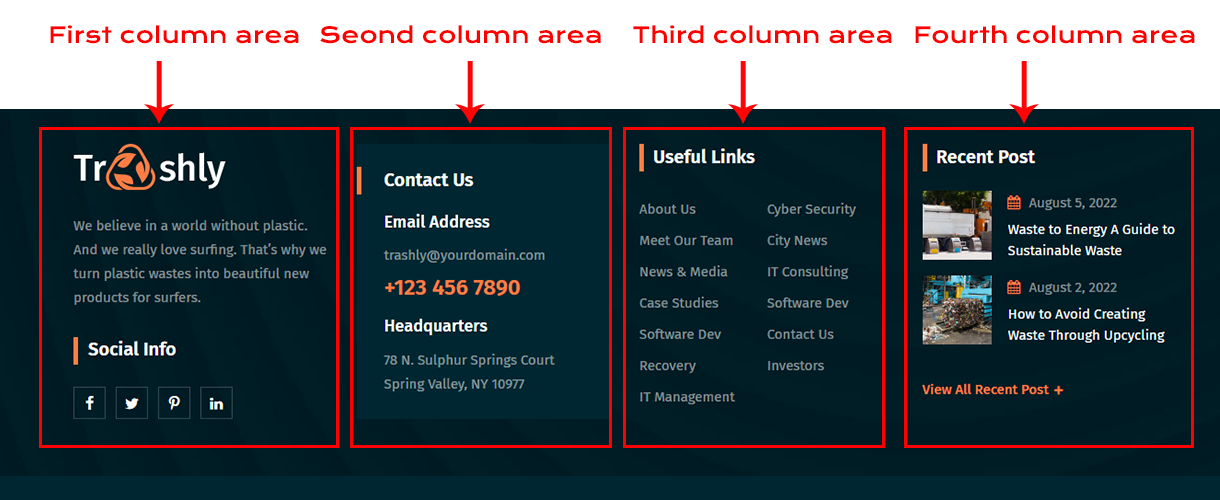
- Second Footer - 1st Widget Area: This will be shown as 1st column in 2nd row of footer area. You can set how many columns you like to show from "Trashly Options > Footer Settings" section.
- Second Footer - 2nd Widget Area: This will be shown as 2nd column in 2nd row of footer area. You can set how many columns you like to show from "Trashly Options > Footer Settings" section.
- Second Footer - 3rd Widget Area: This will be shown as 3rd column in 2nd row of footer area. You can set how many columns you like to show from "Trashly Options > Footer Settings" section.
- Second Footer - 4th Widget Area: This will be shown as 4th column in 2nd row of footer area. You can set how many columns you like to show from "Trashly Options > Footer Settings" section.
You can also change the column view of the Footer widgets. Just go to Admin > Trashly Options > Footer Settings section and change the "Select Footer Column layout View" option: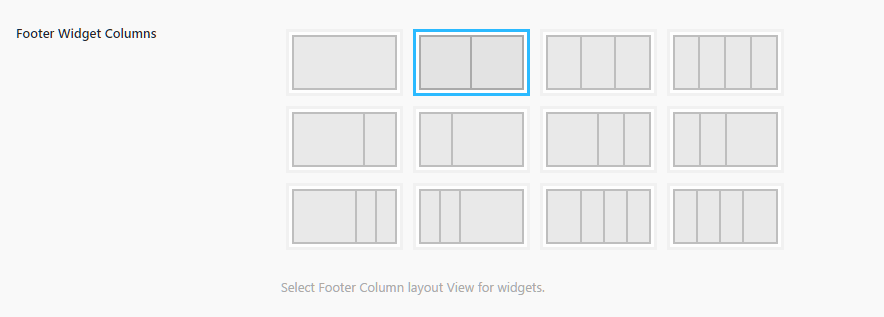
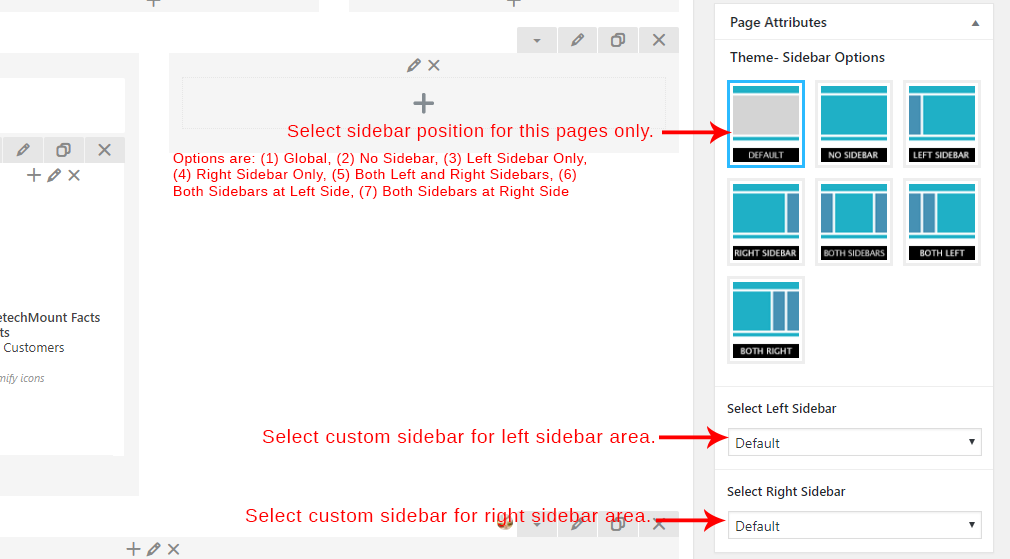
Sidebar options on Page
There is special settings box in page section (screenshot given below). You can select custom sidebar in the Left Sidebar and Right Sidebar options. The "Global" option will show widgets set in Widgets section.
Sidebar option in Trashly Opitons
To change sidebar settings, go to Trashly Options >> Sidebar in your admin panel.
Widgets
Trashly theme provides some built-in widgets that you can use quickly without any external plugins.
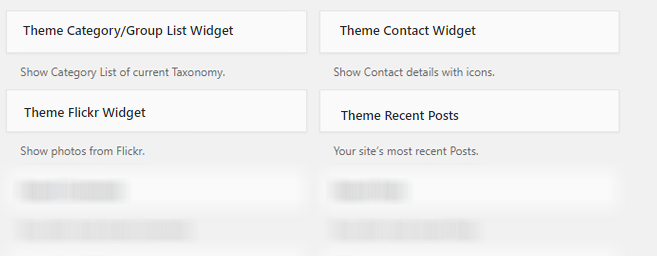
- Trashly Category/Group List Widget: This widget will show Category (Taxonomy) of Group list.
- Trashly Contact Widget: This widget will show Contact details.
- Trashly Flickr Widget: This widget will show Flickr photos.
- Trashly Recent Posts: This widget will show recent blog posts.
Unlimited Sidebars
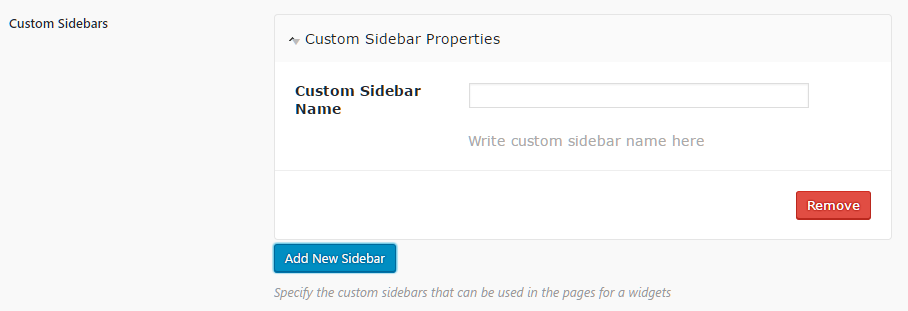
With Trashly theme, you can easily create unlimited sidebars and assign them to any page or post. We described all steps to use custom sidebar feature. Please follow steps given below:
- First we need to create some custom sidebars from Trashly Options. So just go to Trashly Options > Sidebar Settings section from your admin panel. Here you will find "Custom Sidebars" option. Just fill the sidebar name and save theme options. To add more sidebar, just click on "Add New Sidebar" button and add more.
- Now the sidebar is created, we need to
Custom created sidebars can be used on any Page. The custom created sidebars are available on all Pages to select. See screenshot given below: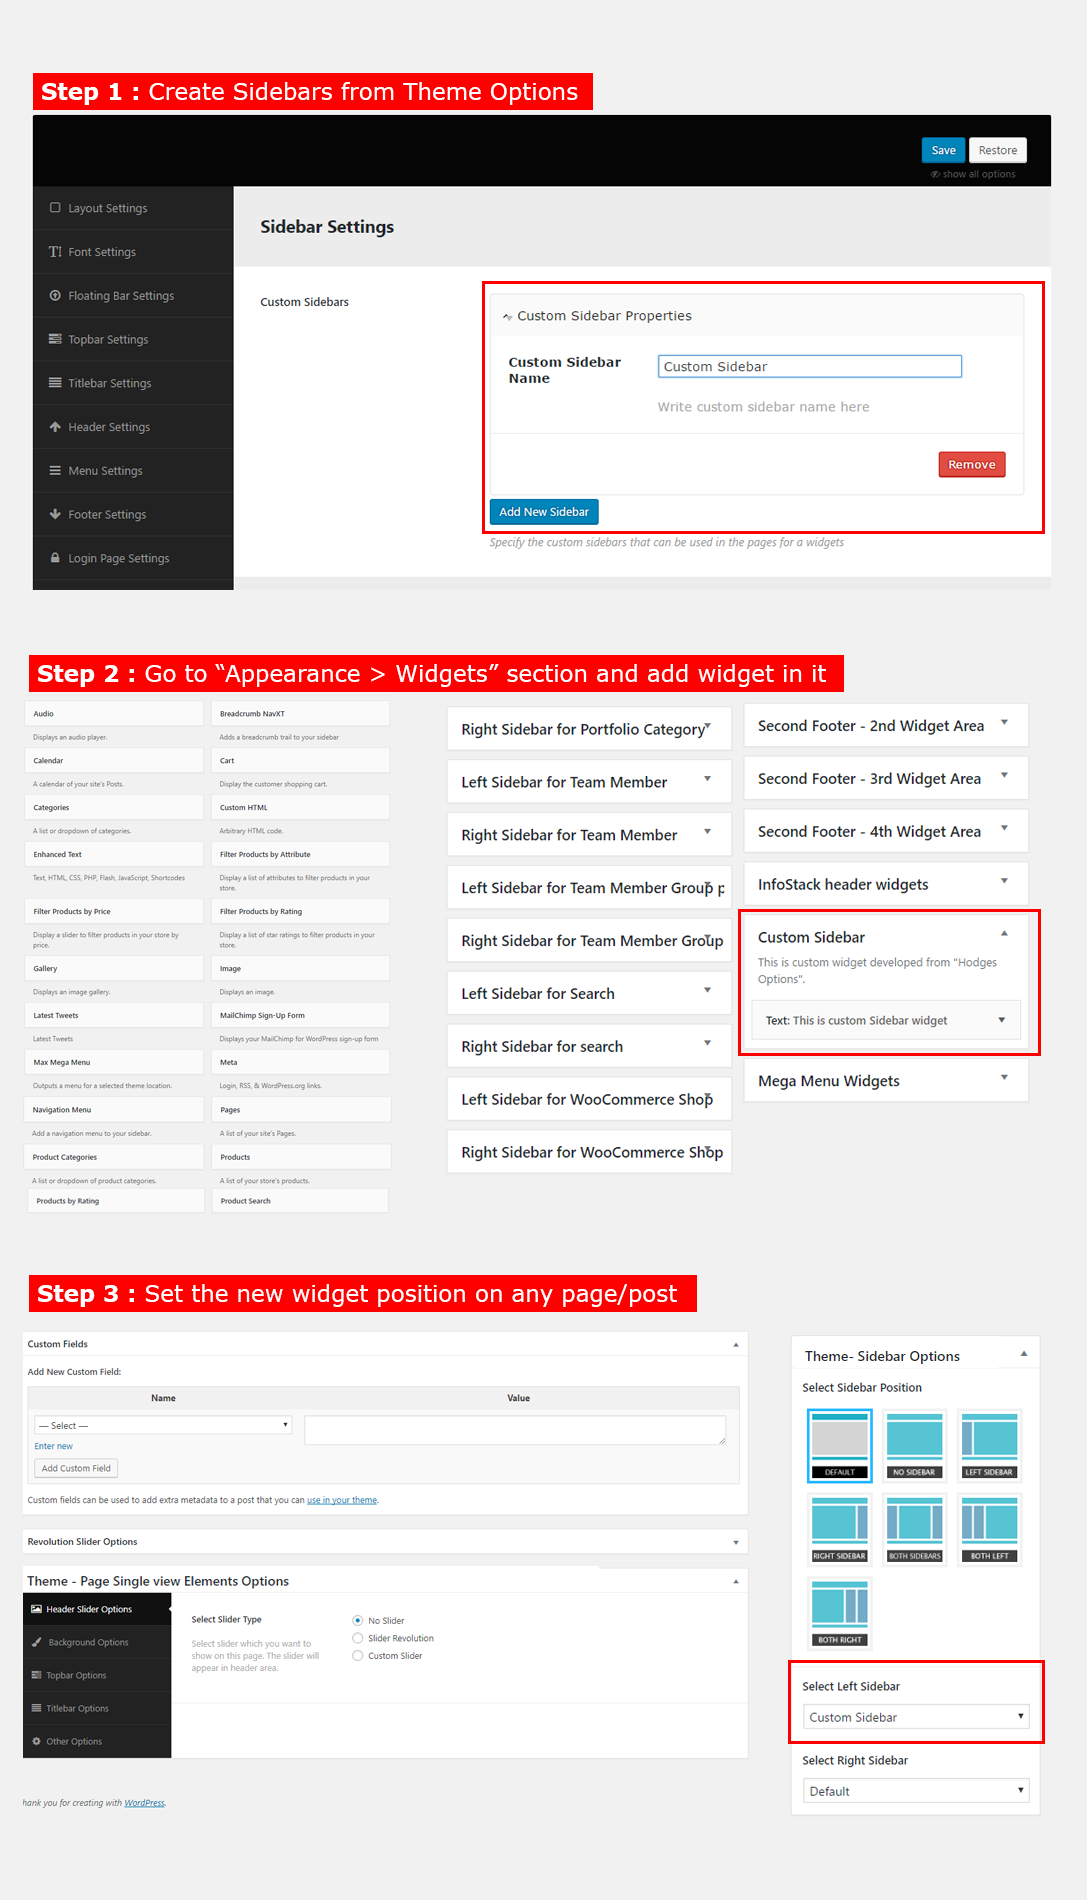
Setting the Slider
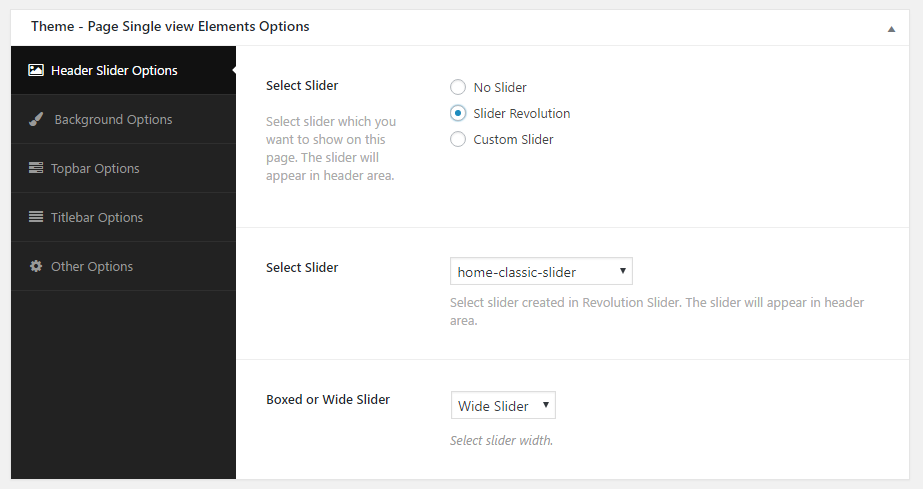
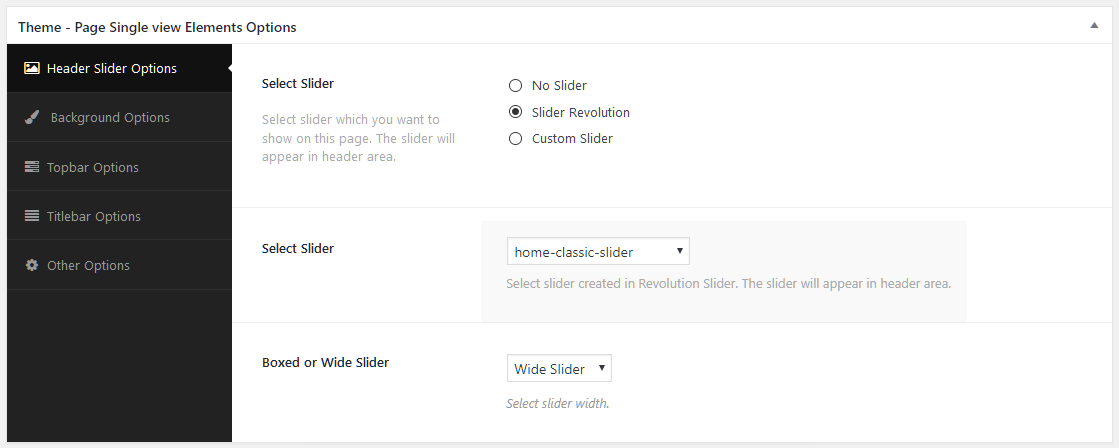
We are providing Revolution Slider and any custom slider (shortcode based) support with our theme. The Revolution Slider plugin is bundled with our theme so you don't need to buy it separately. This plugin should be installed during all plugin installation. You can add slider in any page/post. The option is looks like this:
Revolution Slider
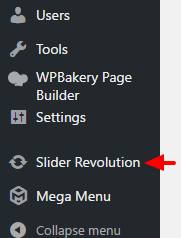 The Revolution Slider is enabled by the "Revolution Slider" plugin. This is third party plugin (not developed by us).
Make sure you created or imported some sliders in Revolution Slider plugin. You can read "Revolution Slider" plugin documentation online to learn how to create slider.
Click here to read it.
Here we described how to select the slider for the page/post. First, edit the page (in backend admin section) or post on which you want to show slider. Than scroll down and you will see the slider box. Just select "Revolution Slider" option. Than you will see two new options. Select slider in first option and than select how you like to show the slider like "Boxed" or "Wide" view. See screenshot given below:
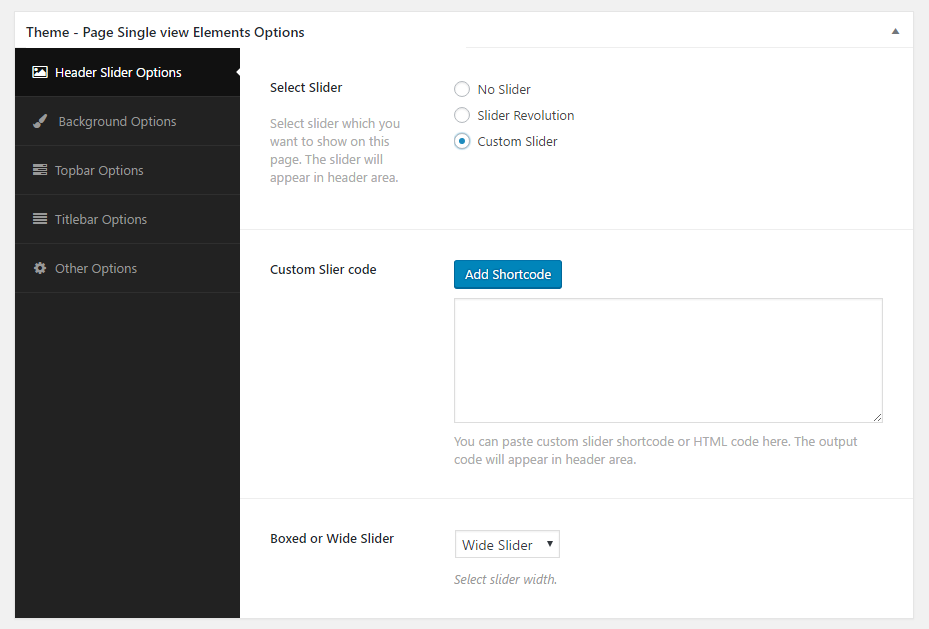
Custom Slider
You can install any third party slider plugin and show the slider using their shortcode too. We are providing option where you can paste shortcode and it will appear in header area.
Just install the plugin and create slider in it. Than copy it's shortcode and paste it in the custom slider box shown in below image:
Setting the Pages
Introduction
Pages are main part of the WordPress and this makes the WordPress a solid CMS tool. You can manage all pages from Admin > Pages section. If you are absolutely new to Wordpress, please check the Overview with WordPress.
Note: Once the page is created, it should be added to menu via Appearance >> Menus if you'd like it to appear in the navigation on website frontend. There are two menu positions Navigation Menu and Footer Menu. The rest of this section is devoted to page templates available within the theme and the custom options provided.
Page options
A number of custom options is available for any page created. Once you are in a specific page in admin panel, scroll down until you see the custom options block illustrated in below Screenshots. We will go through options one by one:
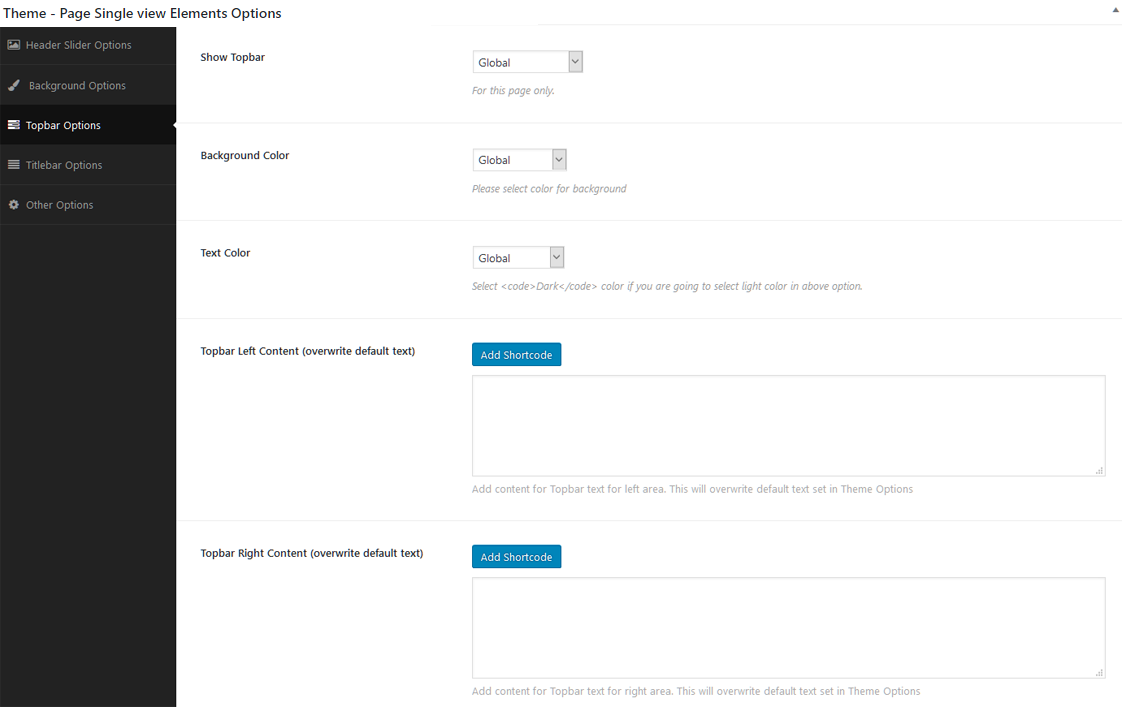
Topbar Options
Don't know what is Topbar? Click here to know.
- Show Topbar: If you want to show or hide Topbar (only on this page) than check this option.
- Background Color: Please select color for background of the Topbar (only on this page). There are some pre-defined colors but you can also select custom color (via color picker) too. Just select "Custom" in this option and the color picker will appear.
- Text Color: Please select color for text in the Topbar (only on this page). There are some pre-defined colors but you can also select custom color (via color picker) too. Just select "Custom" in this option and the color picker will appear.
- Topbar Left Content: Write content for the left side area in the Topbar. (only on this page).
- Topbar Right Content: Write content for the right side area in the Topbar. (only on this page).
Titlebar Options

Don't know what is Titlebar? Click here to know.
- Hide Titlebar: Check this box to hide the Titlebar.
- Page Title: (Optional) Replace current page title with this title. So Search results will show the original page title and the page will show this title.
- Page Subtitle: (Optional) Please fill page subtitle
- Titlebar Background Options: Select background color or image for the Titlebar. You can set any any option related to background from here.
- Titlebar Font Options: Select text color or font family For the Titlebar.
- Titlebar Text Align: You can change global options for this. You can align text like Left, Right etc.
- Titlebar Height: Set height for Titlebar. You can change global options for this.
- Hide Breadcrumb: If you want to hide breadcrumb than check this option
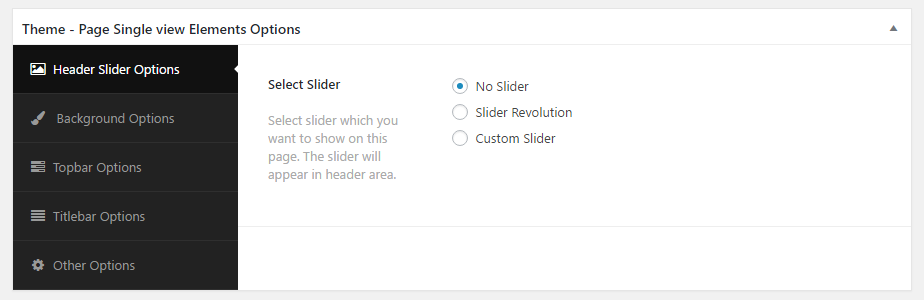
Slider Area Options
- Select Slider Type: Select slider which you want to show on this page. The slider will appear in header area. When you select "Slider Revolution" than it will show you dropdown of the slider you created in "Revolution Slider". When you select "Nivo Slider" or "Flex Slider" than it will show you dropdown of the slider group you created.
- Slide Size: Select slider width size.
Sidebar Widget Options

- Left Sidebar: (Optional) Select your custom sidebar for left sidebar area.
- Right Sidebar: (Optional) Select your custom sidebar for right sidebar area.
- Sidebar Position: (Optional) Select position for sidebars.
Note: You should read about the Sidebars / Widgets section to understand more usage of this box.
Elementor
To learn basics of "Elementor" plugin, please read "Elementor" documentation online by clicking here.
1. Settings
Step 1 - Log in to your WordPress Administration Panel (Dashboard)
Step 2 - Click the Elementor -> Settings
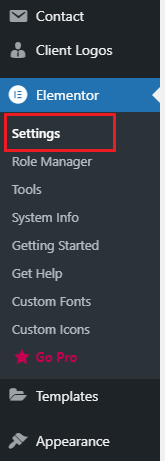
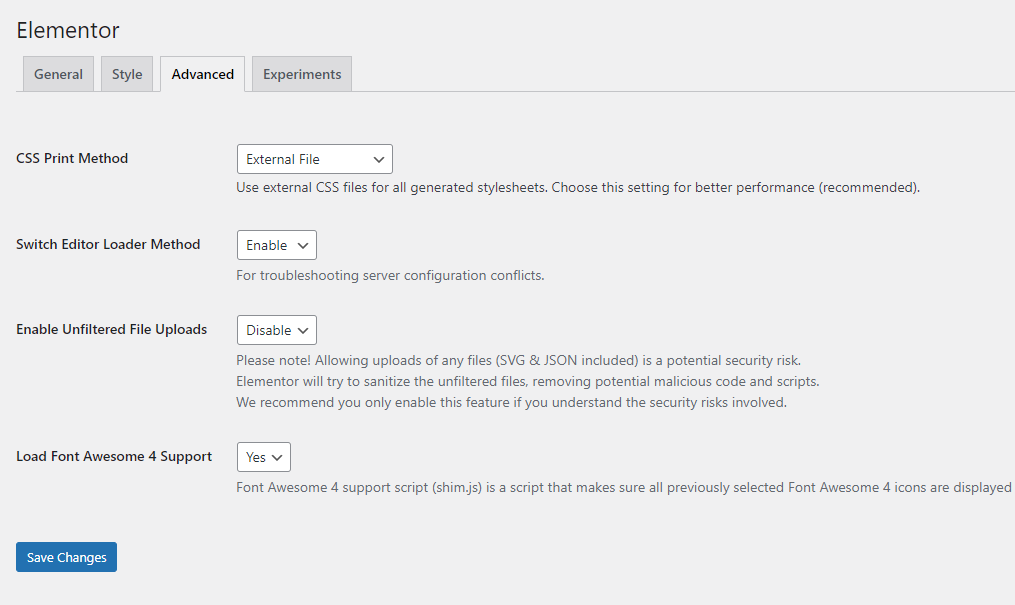
Step 3 - You will see all tabs for setting of elementor , in General tab

Step 4 - In Advanced tab you will see all Method style
Setting the Blog
Introduction
Creating a blog page is easy. Trashly is using native Blog settings. Just create a new page for blog and set it as "Posts page" under Settings >> Reading section. See screenshot given below: 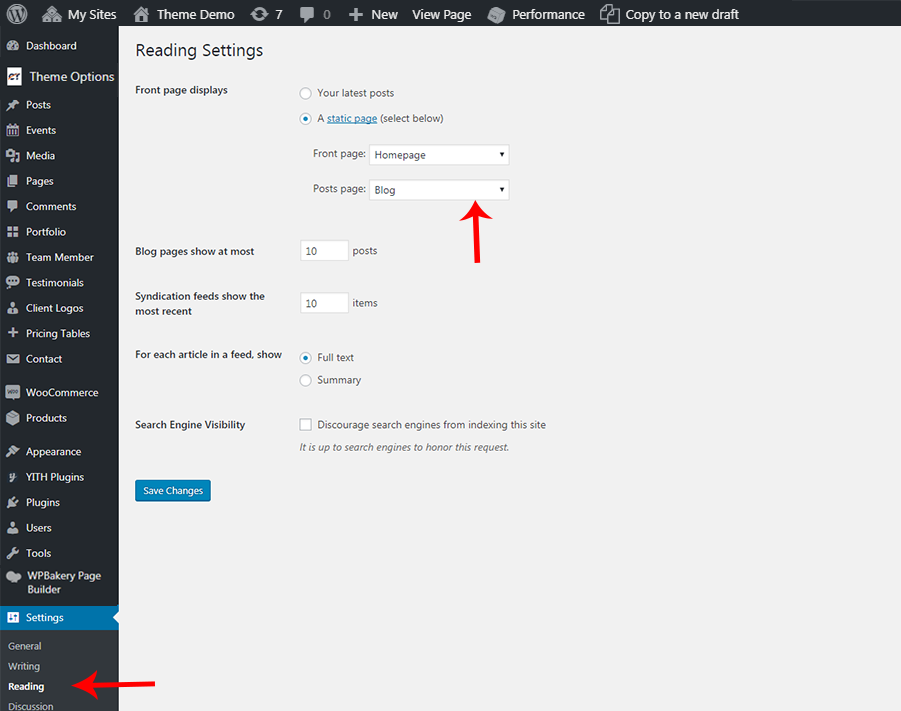
Now start creating new posts by going to "Posts" section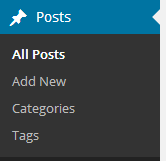
Post Format
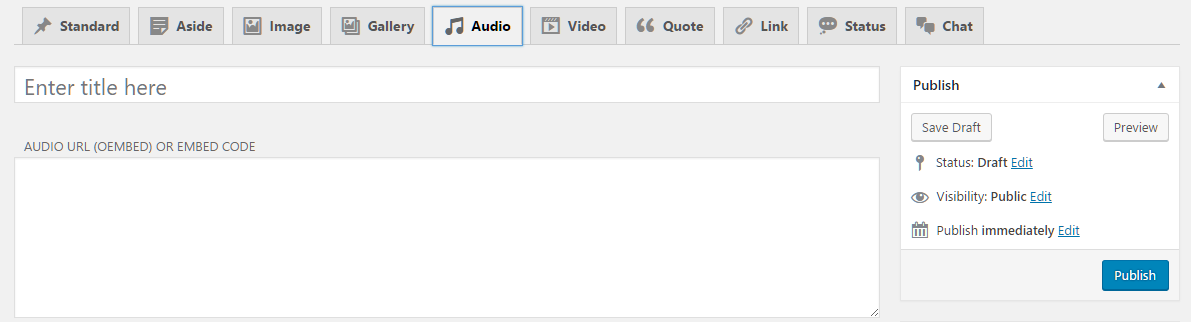
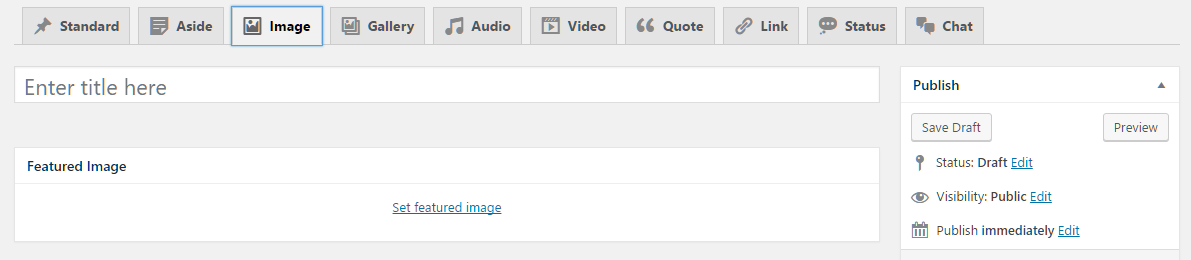
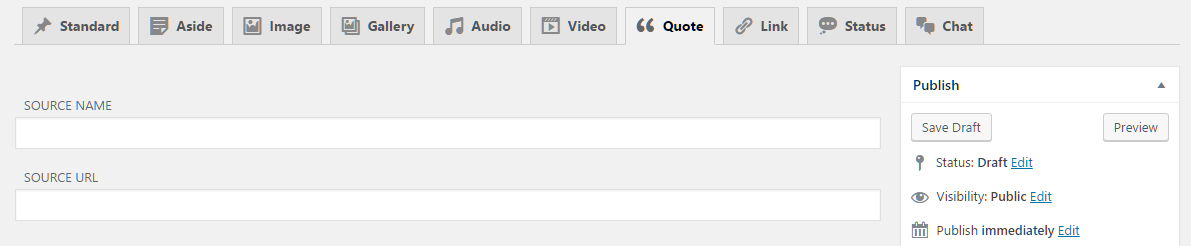
Trashly theme supports 10 post formats. You will see all Post Formats as tabs to select. If you can't see tabs than please install CF Post Formats plugin. Here are list of all supported post formats with details:
- Standard post format:

- Aside post format:

- Audio post format:
- Chat post format:

- Gallery post format:

- Image post format:
- Link post format:

- Quote post format:
- Status post format:

- Video post format:

Setting One-page website
Overview with one-page website
Setting one page website is easy. Just follow the steps given below:
- First you need to set one-page website. Go to Admin > Trashly Options > Layout Settings and enable it by setting it as
ONin One Page Site option.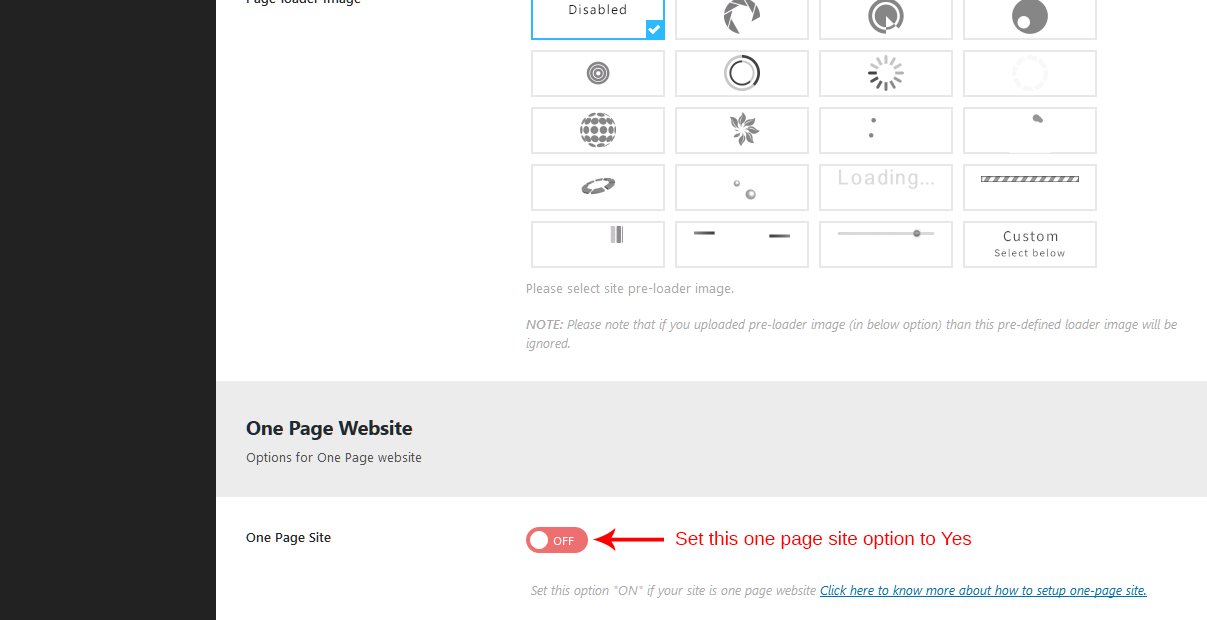
- Now we need to create one page with different IDs and set link for it.
Set link in Appearance > Menus like this:
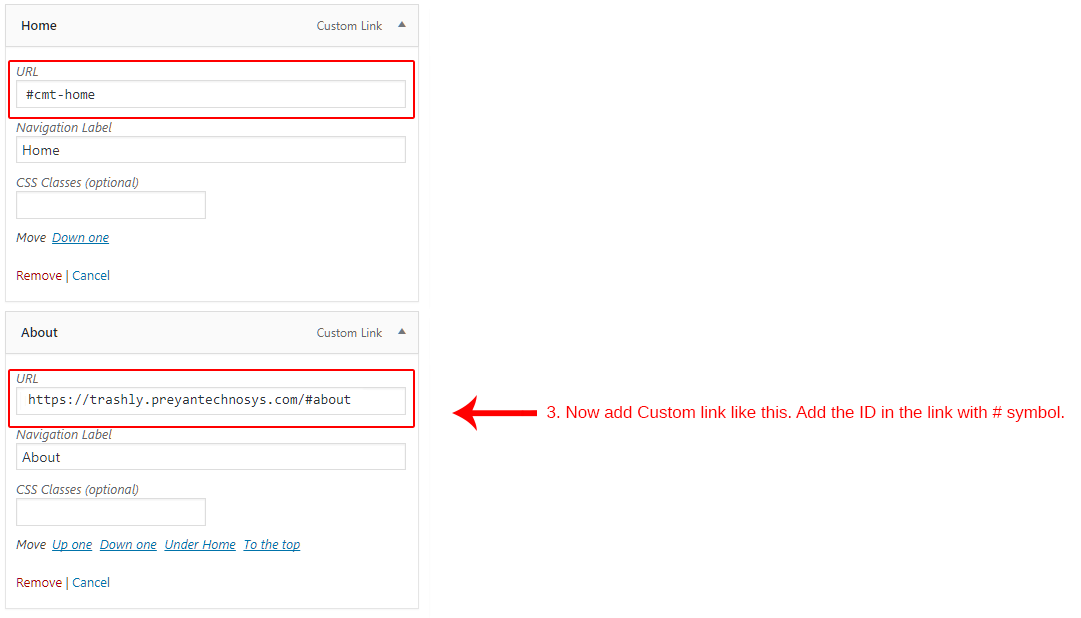
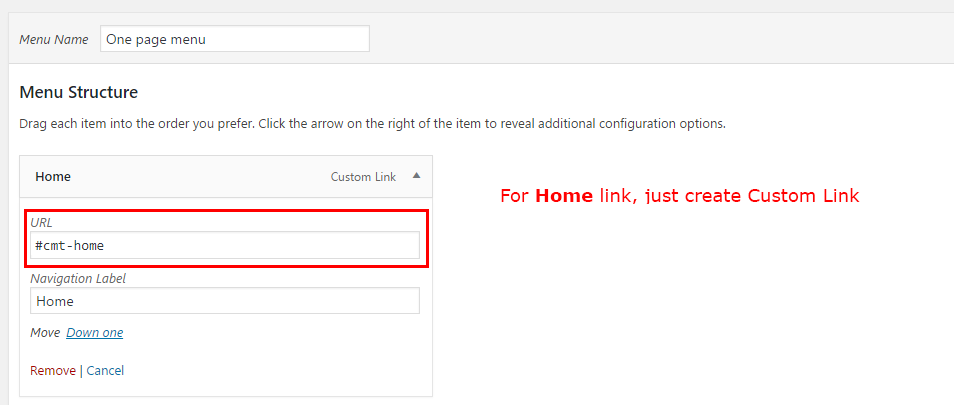
Setting "Home" link for one page
You need to create a new custom link and add #cmt-home as link. This will scroll to top when clicked and also activate Home link in menu.
Setting WPML Multi-Lanuage
For translating the theme you need to add the plugin WPML.
For adding WPML plugin follow below Steps:
Step 1: Go to admin panel
Step 2: Click on plugins option
Step 3: Add New plugin
Step 4: Upload plugin
Step 5: Select the directory where the plugin resides and install it.
Step 6: Activate plugin.
As this plugin is pro version you have to buy it we don't provide it with our theme package.
1.Language Setup.
The languages section allows you to turn a WordPress site multilingual.
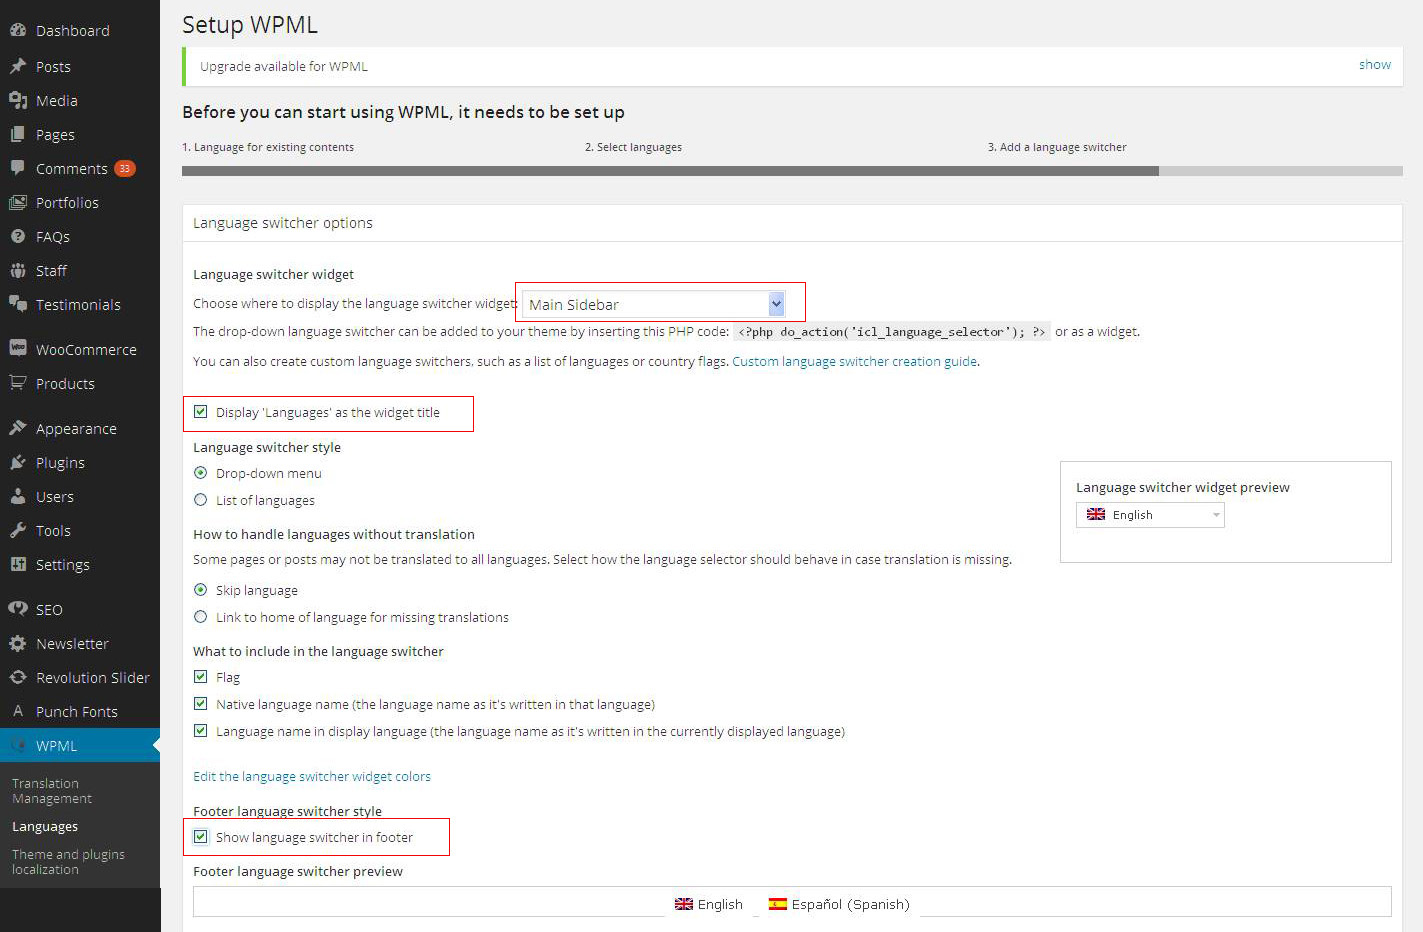
To manage languages, go to WPML > Languages
When you configure WPML for the first time,you need to choose the language of existing content.

You follow up this documentation for more on how to setup language.
Language Setup
Display the language switcher
You can display the language switcher in sidebar, in the footer by selecting the options available when you setup a new language.
2. Select Theme Translate Option
WPML allows to get translations for texts in themes and plugins in who ways:
1) The traditional .mo files (good for when you already got that with the theme).
2) Translating the theme’s texts directly from WPML
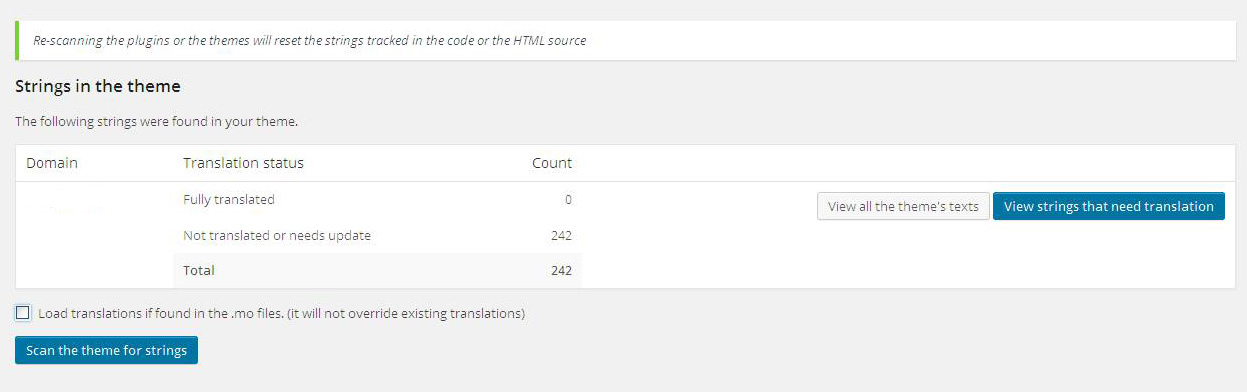
3.Scan Theme Strings for translation
After you clicked on save button you would be able to see the option strings in the theme.
Click on scan the theme for strings.
And it will display the strings that are translated and not translated.
4.String Translation
WPML’s String Translation module is part of the Multilingual CMS package. To enable it, you first need to download and install from your WPML.org account.
Then, go to WPML->String Translation..
1) Add the translation of the text into your language.
2) Check the box for translation is complete.
3) And the save the translation.
4) Same way translate all the strings that are not translated.
Translation
Translation overview
If you are new to translating WordPress, you’re in the right place! In general, internationalization and localization (commonly abbreviated as i18n and l10n respectively) are terms used to describe the effort to make WordPress available in languages other than English for people from different locales. The actual localization is done using the GNU gettext framework, which is used by WordPress itself including the themes and plugins.
Here are overview steps for translating your site.
- Set your WordPress for the language so the admin section will be in your language
- Create language PO file for translation
- Modify the PO file using POEdit software and translate all strings in it. This will also generate MO file which is used by WordPress
1. Set your WordPress for the language
In order to make WordPress recognize the language to which you want to translate the core WordPress, the theme or the plugins, you have to define the language within the wp-config.php file or change a setting within the dashboard. The process is dependent on the WordPress version and is described below:
For WordPress 3.9 and older versions
To Translate WordPress, Follow These Steps.
Step 1 – Login to your FTP account and edit the wp-config.php file.
Step 2 – In the wp-config.php file, look for WPLANG constant which looks like:
define('WPLANG', '');
Step 3 – Define the WPLANG constructor by adding the ISO Language code of your language. The names consist of locals, a combination of language and regional dialect. For example, if you were translating to Deutsch language, change the WPLANG constant to look like the following code:
define('WPLANG', 'de_DE');
For WordPress 4.0 and newer versions
To Translate WordPress, Follow These Steps.
Step 1 – Login to your WordPress admin section.
Step 2 – Than go to Settings > General section and change language from the Site Language dropdown.
Step 3 – Save the settings and done.
2. Create language PO file
Storing translation files in the right directory is very important to make sure the translations you’ve downloaded, created or edited remains functional and intact. There are two ways to store translation files. The first method is storing it inside the themes folder located at the wp-content/languages/themes folder, and the second method is to create a new folder inside wp-content named devfox-languages (this is for safety).
Translation files
We are providing translation files so you can translate your site easily. Just follow the steps given below:
- First you need the PO file to edit it and add your translation in it. We are providing devfox.pot file in our theme folder so you can find it at
/wp-content/themes/devfox/languages/folder. the file name is devfox.pot. You can create PO file from this POT file and add your translations to PO file
Method 1: Storing Inside The /wp-content/languages/themes Folder (recommended)
Generally language files are in the themes folder (that is 3rd method) and you put inside it. But the theme update will remove the language files so we recommend you to put your files outside of the theme folder.
Placing your translation files inside /wp-content/languages/themes folder will make your language files safe and it will not be removed on update. So updating the theme will not overwrite the wp-content folder. Storing your translation files here will ensure they stay intact during updates.
If you choose to store your language files using this method, remember that the file structure is different, and must include the theme name, as well. For example, if the language files are in the Deutsch language, the file names would be devfox-de_DE.mo and devfox-de_DE.po.
Method 2: Storing Inside The /wp-content/devfox-languages/ Folder (for safety)
Generally language files are in the themes folder (that is 3rd method that we don't recommend so we haven't described it) and you put inside it. But the theme update will remove the language files so we recommend you to put your files outside of the theme folder.
Placing your translation files inside /wp-content/devfox-languages/ folder will make your language files safe and it will not be removed on update. So updating the theme will not overwrite the wp-content folder. Storing your translation files here will ensure they stay intact during updates.
In order for WordPress to recognize the language to which you want to translate the theme, you must name the Language files accordingly using the ISO Language Codes. For example, if you wanted to translate devfox to the Deutsch language, the filenames would be de_DE.po and de_DE.mo.
3. Modify the PO file using "POEdit" software
There are different editors out there for the purpose of editing .po files, but POEdit is easy to use, it is available for all platforms and it is freeware. To download POEdit, follow this link.
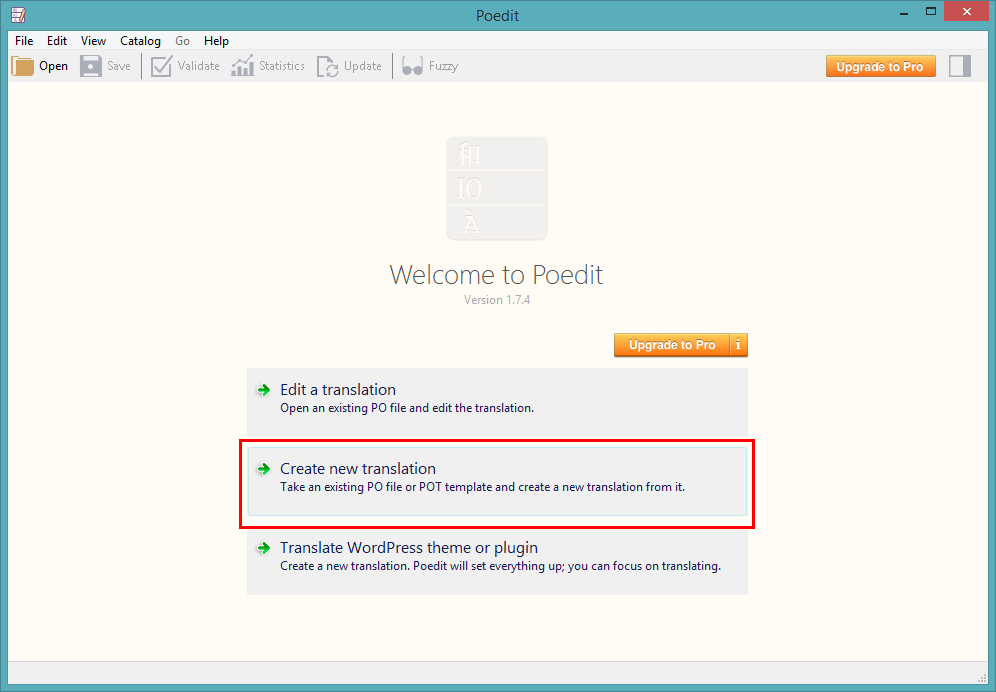
For example, just open the recently saved de_DE.po or trashly-de_DE.po (depends on which step you are following) in this POEdit software and start editing it. Add translated word and save the changes.
Shortcodes
CymolThemes Special Shortcodes
Note: Please make sure you install the CymolThemes Extras for Trashly Theme plugin as this plugin is required for all below given shortcodes to execute. If you do not install this plugin, the shortcodes will not get executed. Click here to know more about how to install this plugin.
Here are list shortcodes with options in our theme.
Site Tagline
[cmt-site-tagline]
This shortcode will show the Site Tagline. There are no options for this shortcode. So just click Insert Shortcode button below to add this shortcode.
Options:
- No options
Example usage:
[cmt-site-tagline]Site Title
[cmt-site-title]
This shortcode will show the Site Title. There are no options for this shortcode. So just click Insert Shortcode button below to add this shortcode.
Options:
- No options
Example usage:
[cmt-site-title]Site URL
[cmt-site-url]
This shortcode will show the Site URL. There are no options for this shortcode. So just click Insert Shortcode button below to add this shortcode.
Options:
- No options
Example usage:
[cmt-site-url]Site Logo
[cmt-logo]
This shortcode will show the Site Logo. There are no options for this shortcode. So just click Insert Shortcode button below to add this shortcode.
Options:
- No options
Example usage:
[cmt-logo]Current Year
[cmt-current-year]
This shortcode will show the Current Year. There are no options for this shortcode. So just click Insert Shortcode button below to add this shortcode.
Options:
- No options
Example usage:
[cmt-current-year]Footer Menu
[cmt-footermenu]
This shortcode will show the Footer Menu. There are no options for this shortcode. So just click Insert Shortcode button below to add this shortcode.
Options:
- No options
Example usage:
[cmt-footermenu]Skin Color
[cmt-skincolor]
This shortcode will show the Text in Skin Color
Options:
Skin Color Text: Write text which will be appear with skin color.
Example usage:
[cmt-skincolor]This is dummy text and this text will be with skin color[/cmt-skincolor]Dropcap
[cmt-dropcap]
This will show text in dropcap style.
Options:
style: This will add style to the dropcap. You can see options in the image thumbnailcolor: This will add color to the text.bgcolor: This will add color to the background. Make sure you selected proper style.
Example usage:
[cmt-dropcap style="square" bgcolor="grey" color="skincolor"]A[/cmt-dropcap]FAQ
Freqently Asked Questions
This page contains solutions for general questions
Questions List
Q1: How to update Trashly theme?
A1: We are providing regular bug fixes, enhancements and also features to our all buyers. So we are releasing new version frequently. The theme update process is handled by the Envato Market Plugin plugin. Click here to know how to setup Envato Market Plugin. You can download the plugin by clicking here.Credits
Images
- Picjumbo: Thanks to picjumbo for great free images.